Festive and Fun: Red And Green Christmas Nails

Get ready to show off your holiday spirit with the perfect festive manicure. In this article, we will explore the enchanting world of red and Christmas Nails. Discover why these colors are a popular choice during the holiday season and learn how to create stunning designs that will make your nails stand out at any festive gathering.
Why Choose Red And Green Christmas Nails?
Red and green are iconic colors associated with Christmas, representing joy, warmth, and tradition. People often choose these colors for holiday nail art for multiple reasons.
Firstly, red is usually associated with Santa Claus and his iconic suit. It symbolizes love, passion, and excitement, which are emotions often felt during the holiday season. On the other hand, Green represents nature, renewal, and the evergreen trees that are a staple in Christmas decorations.
Together, red and green create a classic and timeless combination that instantly brings to mind the festive spirit of Christmas. Whether you’re attending a holiday party or simply want to express your love for the season, red and green Christmas Nails are a perfect choice.
How to Get These Red And Green Christmas Nails?
Creating the perfect red and green Christmas nails is easier than you think. Here’s a step-by-step process to help you achieve flawless festive nails:
Step 1: Gather your materials – To create red and green Christmas nails, you will need a few key supplies. These include red and green nail polish, base coat, top coat, nail art brushes, dotting tools, striping tape, and nail studs or rhinestones.
Step 2: Prep your nails – Start by shaping your nails to your desired length and filing away any rough edges. Apply a base coat to protect your natural nails and allow it to dry.
Step 3: Apply the base colors – Paint your nails with red polish on some nails and green on others. You can choose to alternate the colors, create an ombre effect, or even use one color as the base and the other for the designs.
Step 4: Design your nails – Once the base colors are dry, it’s time to get creative. Use nail art brushes, dotting tools, and striping tape to create various designs. From candy canes to holly leaves, the possibilities are endless.
Step 5: Add embellishments – For an extra festive touch, you can add nail studs or rhinestones to your designs. Apply a top coat to seal in your artwork and give your nails a glossy finish.
Design and Ideas of Red and Green Christmas Nails
1-Simple Christmas Stripes with red and Green nails

2-Christmas Gemstone red and green Nails

3-Festive Swirls red and green nails

4-Red & green French Tip Christmas Nails

5-Christmas Star nails

6-Elegant Red and Green Cute Christmas Nails

7-Shimmer Red and Green Simple Christmas Nail Design

8-Presents Coffin Christmas red and green nails

9-Ice, Snowflakes, and Candy Cane Christmas Nails

10-Gnome Red and Green Christmas Nails

11-Red and Green Plaid Nails for Christmas

12-red and green christmas tree nails

13-Christmas Holy Red Tip French Nails
14-Christmas Baubles red & green nails

15-centaclause Christmas nails

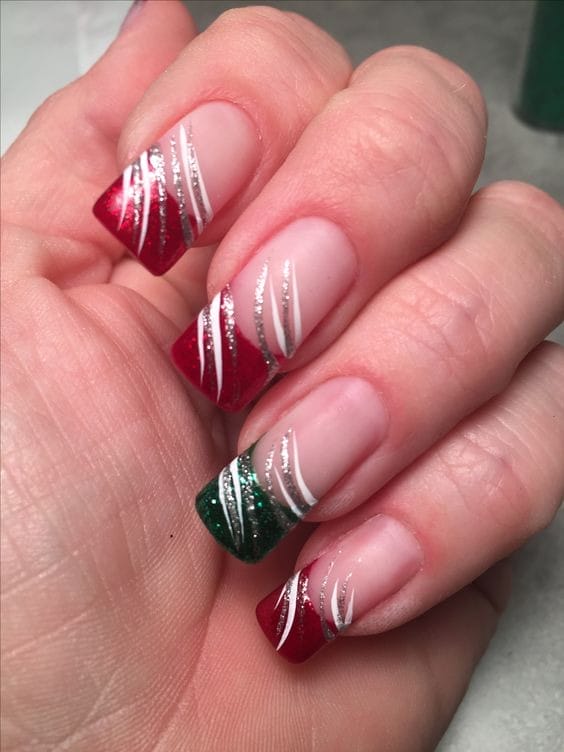
16-Red & green French Tip With Silver Flakes Christmas Nails

17-Christmas Love Nails red and green

18-Spilled Red & green French Tip Christmas Nails

19- Easy Classy French Tip Christmas Nails

20-Holiday Reindeer Nails

21-Red Short Reindeer Nails

Top 10 Designs and Art for Red And Green Christmas Nails
Now that you know how to achieve red and green Christmas nails, let’s explore some stunning design ideas. Here are our top 10 picks:
– Candy Cane Delight: Create a candy cane-inspired design using red and white stripes on a green base.
– Holly Jolly Joy: Paint holly leaves and berries over a red or green base for a whimsical look.
– Festive French Tips: Give your French manicure a holiday twist by using red and green instead of the traditional white tips.
– Ornament Glam: Paint colorful ornaments on a red or green background for a playful and festive look.
– Santa’s Little Helper: Create Santa’s belt buckle on a red base, complete with a gold buckle and black belt.
– Snowflake Sparkle: Use white and silver polish to paint delicate snowflakes on a red or green base.
– Merry Plaid: Create a plaid pattern using red and green stripes for a cozy and festive look.
– Glittery Grinch: Channel your inner Grinch with a green base and glittery accents.
– Winter Wonderland Gradient: Create a gradient effect using white, red, and green polish for a snowy and festive look.
– Gingerbread Galore: Paint gingerbread men, houses, and other holiday treats on a red or green base for a sweet and festive manicure.
Design Breakdown: Step-by-step Process for Each Design
Let’s break down the step-by-step process for each of the top 10 Red And Green Christmas Nail designs:
1. Candy Cane Delight:
– Apply a green base color and let it dry.
– Use a thin nail art brush or striping tape to create red and white stripes diagonally across the nail.
– Seal with a topcoat for a glossy finish.
Unique Tips and Variations: You can switch up the colors and create candy cane-inspired designs using different shades of red and green.
2. Holly Jolly Joy:
– Apply a red or green base color and let it dry.
– Use a thin nail art brush to paint holly leaves and berries on the nails.
– Add details with a dotting tool or toothpick.
– Seal with a topcoat for a glossy finish.
Unique Tips and Variations: You can experiment with different leaf shapes and add glitter accents for extra sparkle.
3. Festive French Tips:
– Apply a red or green base color and let it dry.
– Use a striping brush or tape to create a French tip with the opposite color.
– Seal with a topcoat for a glossy finish.
Unique Tips and Variations: Try adding holiday-themed designs to the French tips, such as snowflakes or Christmas trees.
4. Ornament Glam:
– Apply a red or green base color and let it dry.
– Use a thin nail art brush or dotting tool to paint colorful ornaments on the nails.
– Add details with contrasting colors and seal with a topcoat for a glossy finish.
Unique Tips and Variations: Experiment with different ornament shapes and sizes to create a unique design.
5. Santa’s Little Helper:
– Apply a red base color and let it dry.
– Use a thin nail art brush or striping tape to create a black belt diagonally across the nail.
– Add a gold buckle using a dotting tool or toothpick.
– Seal with a topcoat for a glossy finish.
Unique Tips and Variations: You can switch up the colors and create a green base with a red belt for a different take on this design.
6. Snowflake Sparkle:
– Apply a red or green base color and let it dry.
– Use a thin nail art brush or dotting tool to create delicate snowflake designs using white and silver polish.
– Seal with a topcoat for a glossy finish.
Unique Tips and Variations: Try using different shades of blue for a wintery twist on this design.
7. Merry Plaid:
– Apply a red or green base color and let it dry.
– Use a thin nail art brush or striping tape to create a plaid pattern using red and green stripes.
– Seal with a top coat for a glossy finish.
Unique Tips and Variations: You can experiment with different plaid patterns and colors to create a unique look.
8. Glittery Grinch:
– Apply a green base color and let it dry.
– Use a thin nail art brush or rotting tool to paint glittery accents such as the Grinch’s eyes or his signature smirk.
– Seal with a top coat for a glossy finish.
Unique Tips and Variations: Experiment with different glitter colors and add other Grinch-inspired elements like his Santa hat.
9. Winter Wonderland Gradient:
– Apply a white base color and let it dry.
– Use a makeup sponge to create a gradient effect using red and green polish.
– Seal with a topcoat for a glossy finish.
Unique Tips and Variations: You can switch up the colors and create different gradient combinations for a personalized look.
10. Gingerbread Galore:
– Apply a red or green base color and let it dry.
– Use a thin nail art brush or dotting tool to paint gingerbread men, houses, and other holiday treats on the nails.
– Add details with contrasting colors and seal with a topcoat for a glossy finish.
Unique Tips and Variations: Experiment with different gingerbread designs and add rhinestones or glitter for extra sparkle.
Pros and Cons of red and green Nails
| Pros. | Cons. |
| Symbolizes the holiday spirit and adds a festive touch to your overall look | Requires time and effort to achieve intricate designs. |
| Red and green are classic colors that never go out of style during the holiday season | May require additional tools and supplies. |
| Allows for creative expression and customization with various designs and art. | Designs may not last as long as a single-color manicure. |
Summary
Red and green Christmas nails are a fantastic way to showcase your holiday spirit and add a touch of festive magic to your look. From candy cane designs to winter wonderland gradients, there are endless possibilities to explore. By following our step-by-step guide and incorporating unique tips and variations, you can create stunning Red And Green Christmas Nails that will make you the star of any holiday gathering. So, grab your nail polish and get ready to spread some festive cheer with your perfectly manicured nails!
-

The time required depends on the complexity of the design and your skill level. Simple designs can be done in around 30 minutes, while more intricate designs may take up to an hour.
-
Absolutely! Our step-by-step guide helps beginners create stunning red and green Christmas nails. With practice and patience, you’ll be able to achieve beautiful designs
-
The longevity of your red and green Christmas nails depends on various factors such as the quality of the polish, the top coat used, and your daily activities. On average, they can last up to a week with proper care.


